
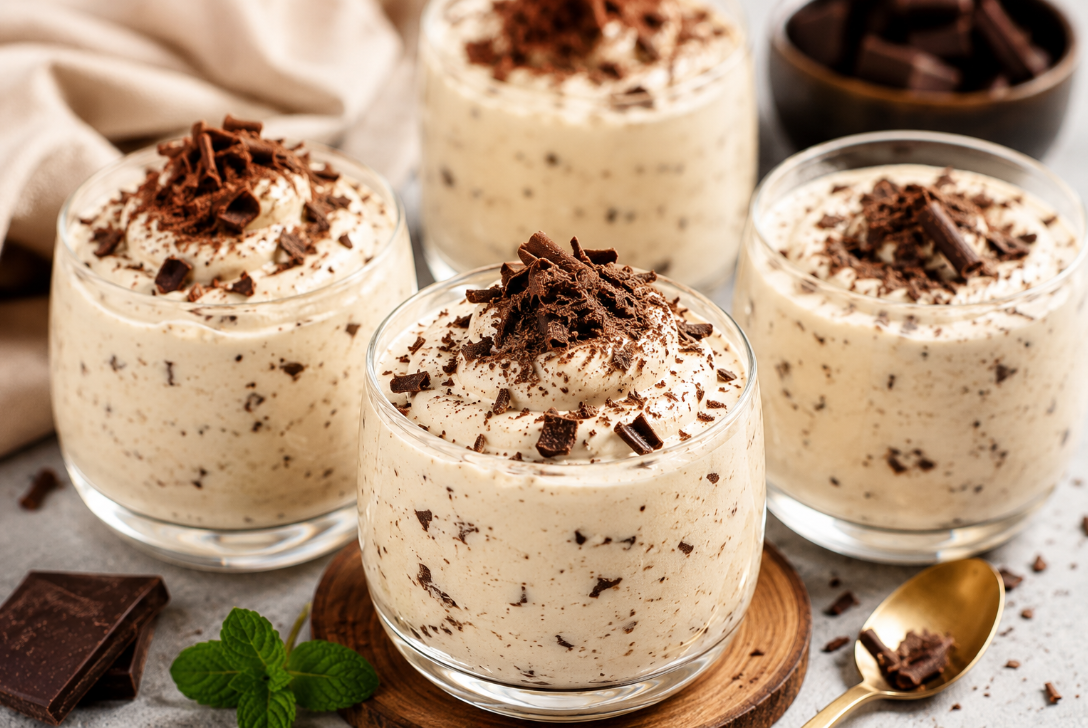
If you’re craving something sweet but don’t want to spend hours baking or cleaning a sink full of dishes, this dessert made in a blender is exactly what you need. With a handful of simple ingredients and one kitchen appliance, you’ll create an irresistibly creamy dessert that tastes like it came straight from a café.
The combination of fluffy whipped cream, sweet condensed milk, and rich chocolate creates a smooth, mousse-like texture that melts in your mouth. Whether you’re entertaining guests or simply treating yourself after dinner, this recipe delivers impressive results with very little effort.
Table of Contents
- Why This Blender Dessert Is Worth Trying
- Ingredients You’ll Need
- Time Breakdown
- Step-by-Step Instructions
- Why Blending Makes a Difference
- Nutrition Information
- Serving & Storage Tips
- Frequently Asked Questions
Why This Blender Dessert Is Worth Trying
Traditional creamy desserts often require cooking over the stove, constant stirring, or complicated techniques. This recipe eliminates all of that.
Using a blender allows the ingredients to mix quickly while trapping tiny air bubbles inside the cream. The result is a dessert that’s incredibly light, silky, and smooth without requiring gelatin or baking.
You’ll also appreciate that everything comes together in a single blender jar, making cleanup almost effortless.
Reasons You’ll Love It
- No baking required
- Only one appliance to clean
- Ready in just minutes
- Elegant enough for special occasions
- Easily customized with different flavors
- Perfect make-ahead dessert
Ingredients You’ll Need
- 2 cups cold heavy whipping cream
- 1 (14-ounce) can sweetened condensed milk
- 1 cup whole milk
- 1 tablespoon pure vanilla extract
- ½ cup dark chocolate chips or finely shaved dark chocolate
- Pinch of sea salt
Time Breakdown
| Task | Time |
|---|---|
| Preparation | 10 minutes |
| Blending | 2 minutes |
| Chilling | 4 hours |
| Total Time | 4 hours 10 minutes |
Step-by-Step Instructions
Step 1 – Chill the Blender
For the best texture, place the blender jar in the refrigerator for about 15 minutes before you begin. Starting with a cold container helps the whipping cream become thicker and fluffier during blending.
Step 2 – Add the Main Ingredients
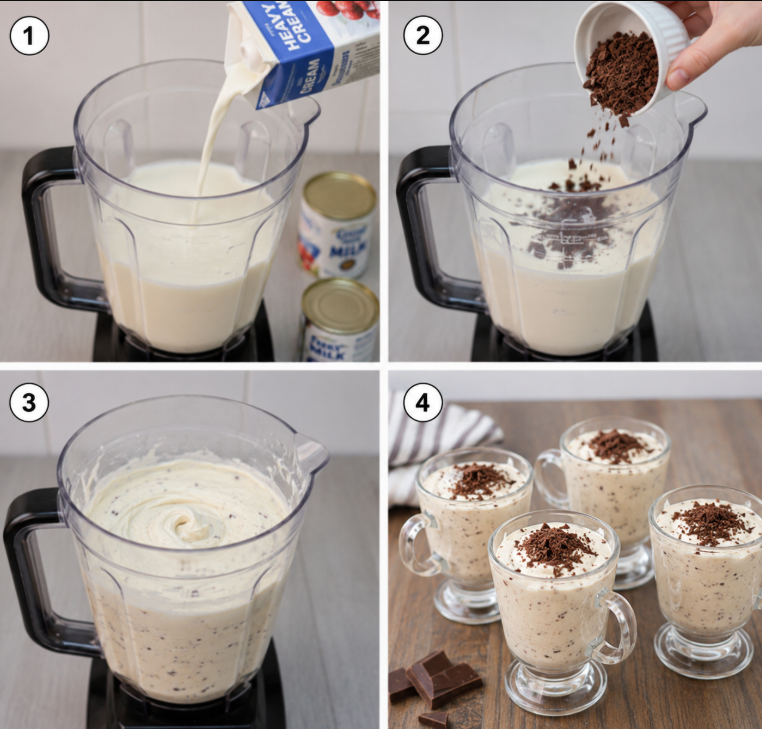
Pour the following into the chilled blender:
- Heavy whipping cream
- Sweetened condensed milk
- Whole milk
- Vanilla extract
- Sea salt
Make sure all ingredients are well chilled before blending.
Step 3 – Blend Until Creamy
Blend on medium-high speed for 1–2 minutes.
Watch the texture carefully. The mixture should become thick and airy, resembling soft-serve ice cream. Avoid blending for too long, as excessive mixing may cause the cream to separate into butter.
Step 4 – Fold in the Chocolate
Open the blender and gently stir in the chocolate chips or shaved chocolate using a spatula.
Mix by hand instead of blending so the chocolate keeps its texture and adds little bursts of crunch in every bite.
Step 5 – Portion the Dessert
Transfer the mixture into dessert glasses, ramekins, or one large serving bowl.
Smooth the tops with the back of a spoon to create attractive swirls before chilling.
Step 6 – Refrigerate
Cover each serving with plastic wrap and refrigerate for at least 4 hours.
This resting time allows the dessert to firm up while maintaining its light, creamy consistency.
Why Blending Makes a Difference
One of the biggest advantages of making dessert in a blender is consistency.
The fast-spinning blades thoroughly combine the dairy ingredients while incorporating air into the mixture. This creates a velvety texture that’s difficult to achieve by hand.
Even better, this recipe works as a fantastic base for countless flavor variations. Replace vanilla with peppermint extract for a refreshing twist, or stir in a shot of espresso for an indulgent mocha version. Once you’ve mastered the original recipe, the possibilities are endless.
Nutrition Information
Per Serving (6 servings total)
- Calories: 340
- Total Fat: 22g
- Sugar: 28g
- Protein: 5g
- Calcium: 15% Daily Value
Serving & Storage Tips
For an eye-catching presentation, sprinkle each serving with cocoa powder, grated chocolate, or garnish with a fresh mint leaf. A drizzle of salted caramel also pairs beautifully with the creamy base.
Store leftovers in an airtight container in the coldest part of your refrigerator for up to 3 days.
If you’d like a firmer consistency similar to ice cream, place the dessert in the freezer for about 2 hours before serving.
Frequently Asked Questions
Can I substitute low-fat milk?
Yes, you can replace the whole milk with low-fat milk if preferred. However, the heavy whipping cream should remain unchanged because its fat content is essential for achieving the correct texture.
Why didn’t my dessert thicken?
The most common reason is that the ingredients weren’t cold enough before blending.
Using chilled dairy products and a cold blender jar helps the cream trap air properly, creating the light consistency this dessert is known for.
Can I add fruit?
Absolutely.
Fresh raspberries, strawberries, or other berries make a wonderful addition. Fold them in after blending so they stay fresh and provide a pleasant contrast to the sweet cream.
Final Thoughts
This dessert made in a blender proves that creating an elegant homemade dessert doesn’t have to be difficult. With just a few pantry staples and one blender, you can prepare a silky, chocolate-speckled treat that’s perfect for family dinners, celebrations, or whenever you’re craving something sweet.
Simple, creamy, and wonderfully versatile, it’s a recipe you’ll find yourself making again and again.
Have you tried this recipe? Share your favorite toppings or flavor ideas in the comments below—we’d love to hear how you made it your own!